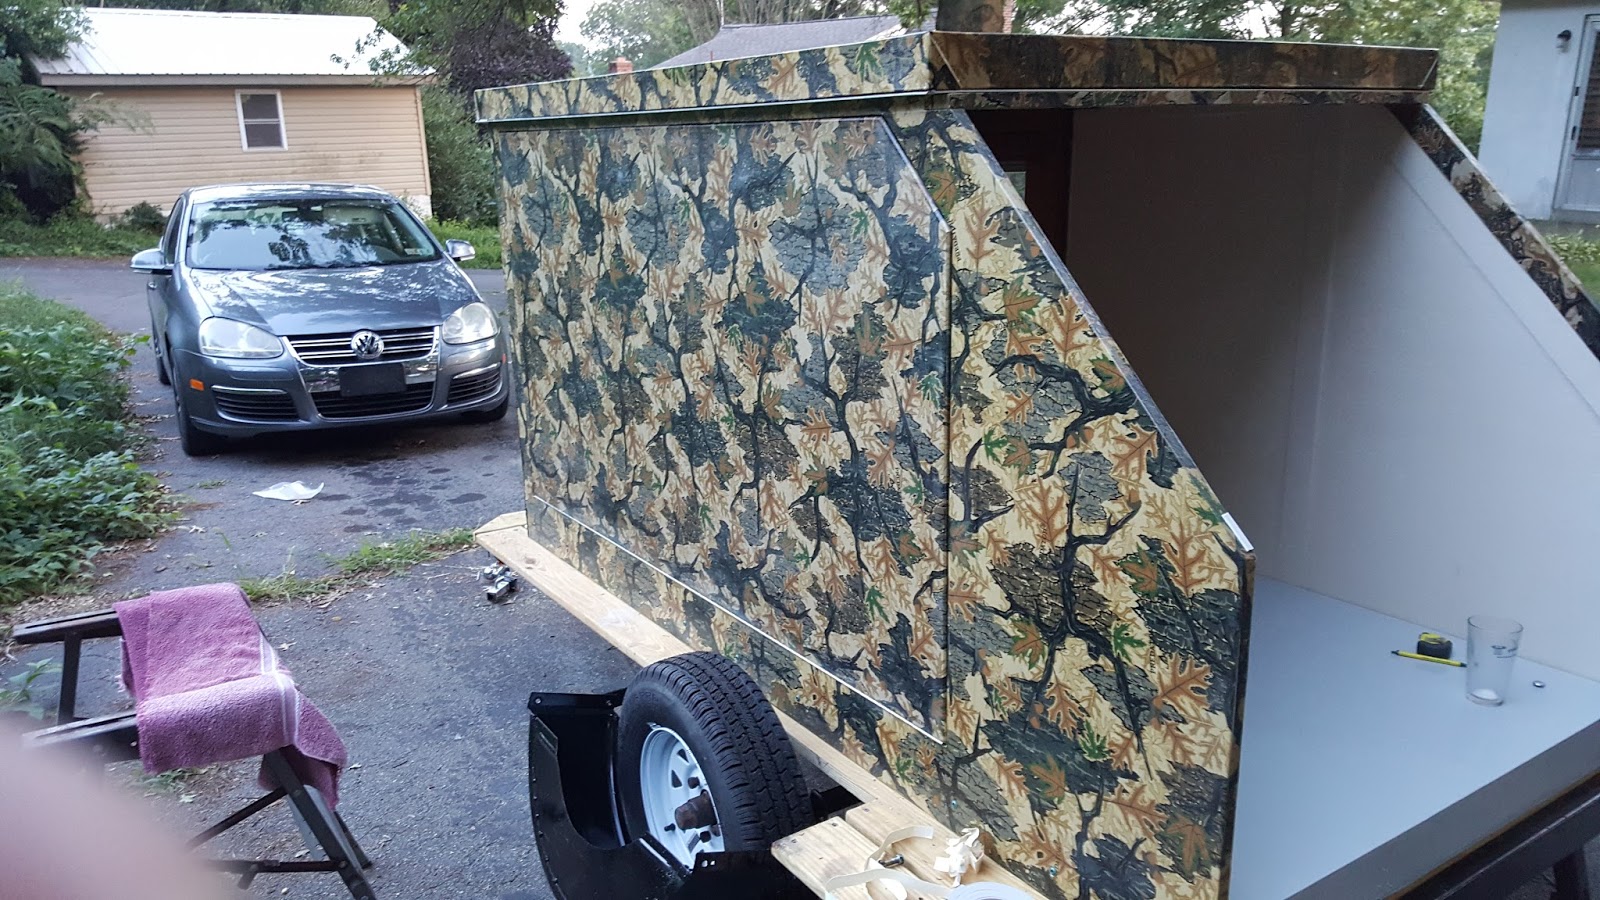
All though the camper was not completely done. In august I took my tiny camper to the Potter county archery festival. Things worked out pretty well.
There are are a couple of things I want to change after using it.
One is to change the seat storage lid,I found myself piling stuff on top of it, then having to move it all to gain access to the storage compartment. Second, need more storage and nooks to put stuff. Third the galley need drawers to put stuff.
Showing posts with label smallcamper. Show all posts
Thursday, October 8, 2015
Wednesday, July 22, 2015
Camper frame and assembly
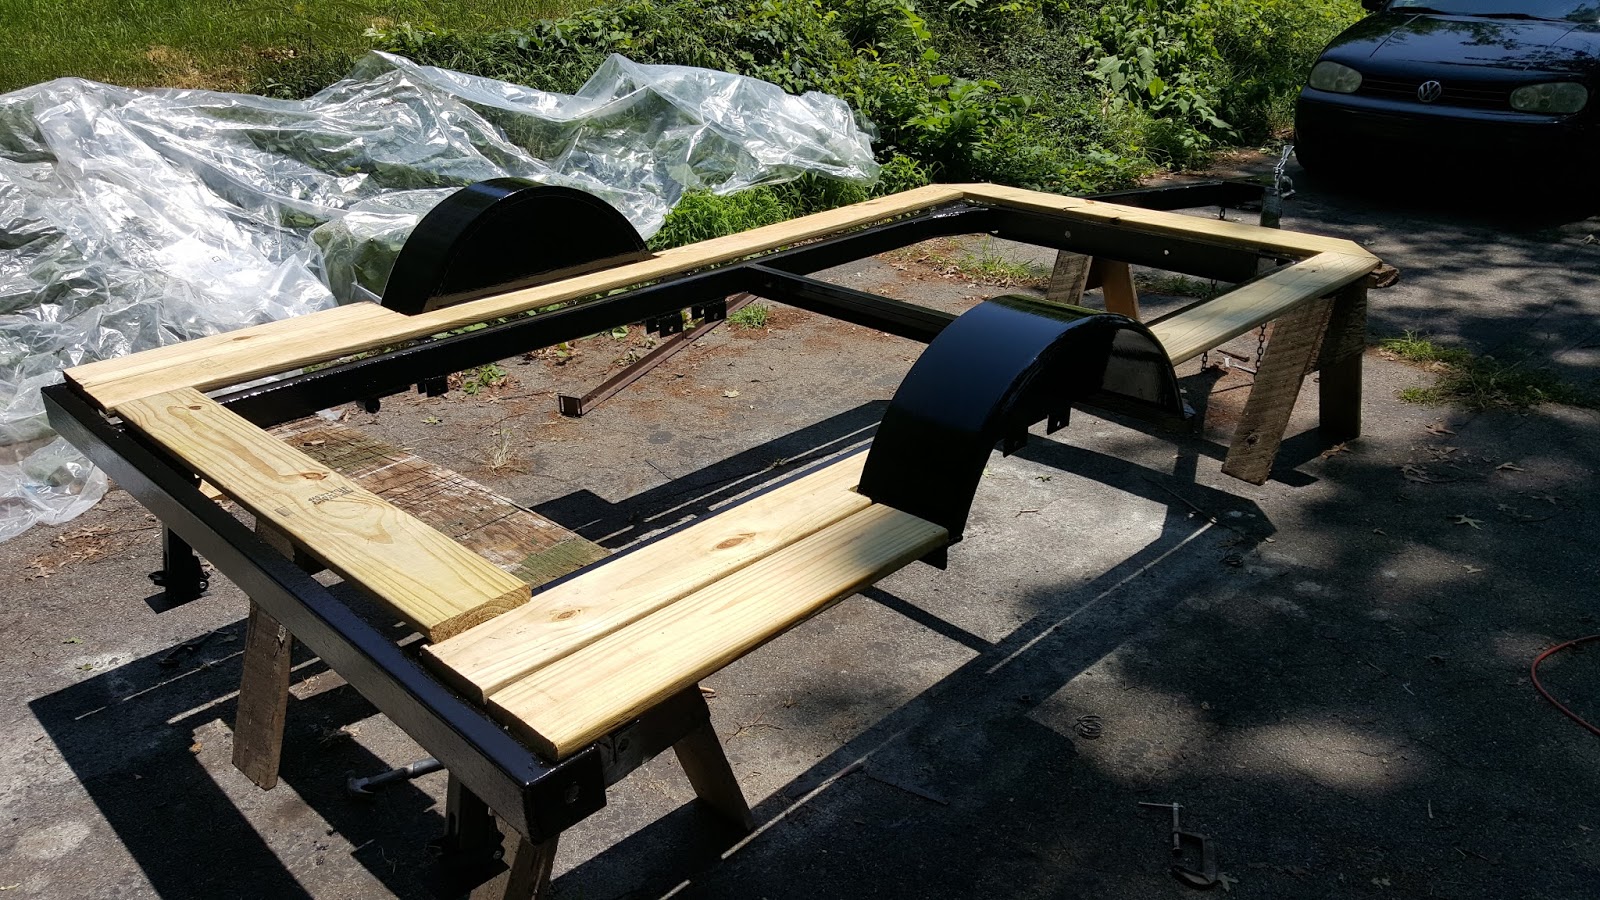
The original plan was to use my existing 4X8 trailer and slide the camper on. But a I found a bare frame cheap with a title. It just needed to be cleaned, painted and new tires. Assembly of the camper body was like putting together a piece of IKEA furniture.

Now I need to do all the detail work, weather stripping, latches and the other stuff I forgot about. The roof and side popout canvas will be done over the winter.
![]() |
| Drop axle |
![]() |
| Stripped down frame |
![]() |
| Cleaned with new fenders, ready to be painted. The axle was moved forward 6 inches. |
![]() |
| Painted with test fitting of decking boards |
![]() |
| Finished frame with epoxy coated floor |
![]() |
| Side walls being attached |
![]() |
| Roof section |

![]() |
| Side pop out showing clearance from tire. This was a concern of mine because it was designed for a different trailer frame. |
![]() |
| Side showing fender in the up position. |
![]() |
| Fender folded down |
![]() |
| Rear view with all lids on. |
Now I need to do all the detail work, weather stripping, latches and the other stuff I forgot about. The roof and side popout canvas will be done over the winter.
Monday, April 20, 2015
Camper roof and door progress
I finally got the angle, hinges and hardware, so I can hopefully finish it and use it this summer. The roof and rear hatch doors are done and need to be covered with fabric. For the door I found a window at the Rehabit store and disassembled it and cut it shorter.
| The roof installed |
| Inside view of the door with latch installed. Just need to seal the wood work. |
| The aluminum pipes that will raise the roof will slide on the wooden rafters. |
| The rafters overlap causing a slight bow to help shed off water. |
| I used a ratchet strap to clamp the roof sides while the glued biscuits dried. |
| Front inside view. Need to stain the roof to match and maybe make some insulating panel inserts. |
Wednesday, February 4, 2015
Camper update
Ok, this project has turned into a long term one. I was hoping to be able use it at the camp Mack archery shoot in April. But I don't think it will be done by then due to budget constraints. Right now I need to get the aluminum hinges and angles to continue the build.
All the plywood used in the galley and storage bench is recycled from old kitchen panels a friend gave me after a remodeling job.
| rear of galley there will be fold down shelves here |
| galley |
| door with full window |
| this is the side that will have the fold out tent |
| a seat/storage in the front |
Monday, October 6, 2014
Outer fabric skin and making clean edges
The pictures below show the skinning of the front bulkhead. Since the walls will be assembled later the corners and edges need to be flat and even. The fabric is placed over the wall, half of it is folded back and glue is applied. Then it is placed back over the glue and pressed down with an iron on the lowest heat setting. This technique as also used to apply the inside fabric and the builders paper.
| Tape is used to make clean strait edges. Excess is trimmed off |
| flip over fabric edge |
| applying tightbond 2 glue |
| Fold at edge of the tape |
| add more glue to folded edge |
| press flat with iron and remove tape |
| finished corner nice and flat to screw to the floor section. |
| inside of front wall |
| outer skin, just need to apply more Tightbond 2 that will soak in and give a hard surface finish. |
| close up of outer fabric |
Small camper build
After many years of packing my car full to travel to archery festivals, I decided it's time to build
a small travel trailer. This way I can load up the trailer with gear, have a galley for cooking and a warm place to sleep. Oh yeah, so i can bring more fire wood, the Denton hill shoot was really cold this year and the camp mack shoot is always cold.
The camper is made to slide on to a 4X8 foot utility trailer. Weight is my biggest factor in the build. It is going to made with pine framing with foam cores and covered with fabric and glue. It is designed with a pop up roof and the left side folds down to in crease the sleeping area. When traveling it can be used with out opening the top or side bunk, (like a couple of hours sleep at a wallmart parking lot).
Since I don't have a garage it will be built in my basement in pieces over the winter and assembled out side in the spring. The parts will be left and right walls, front wall, roof, galley and floor.
a small travel trailer. This way I can load up the trailer with gear, have a galley for cooking and a warm place to sleep. Oh yeah, so i can bring more fire wood, the Denton hill shoot was really cold this year and the camp mack shoot is always cold.
The camper is made to slide on to a 4X8 foot utility trailer. Weight is my biggest factor in the build. It is going to made with pine framing with foam cores and covered with fabric and glue. It is designed with a pop up roof and the left side folds down to in crease the sleeping area. When traveling it can be used with out opening the top or side bunk, (like a couple of hours sleep at a wallmart parking lot).
Since I don't have a garage it will be built in my basement in pieces over the winter and assembled out side in the spring. The parts will be left and right walls, front wall, roof, galley and floor.
![]() |
| right side showing galley an entry door |
![]() |
| left side showing fold down bunk and pop up top |
| unfinished boards from old skids that were used in shipping new chicken house equipment |
| ripped and planed boards.They were left to dry out for a month or two,measured and checked for shrinkage. |
| Floor with foam core to add strength, new materials were used in this part. I for got to rip the boards to a wider width. |
| top floor showing storage holes. The covering was trimmed with a router |
| front bulk head |
| covered in builders paper |
| right side |
| covered in paper |
| The inside is covered with old table cloths I had laying around |
| coated and sealed with acrylic paint with no pigment added |
| finished interior of the front bulk head. |
Subscribe to:
Posts (Atom)